How to live stream your Serato DJ sets
Live streaming your DJ sets is now even easier with Serato DJ Pro and Serato DJ Lite. You can easily make Serato DJ’s audio output available to other applications via a virtual audio device. This removes the need for an external audio interface or another laptop when you’re live streaming with applications such as OBS or other broadcasting tools.
Make sure you download the latest version of Serato DJ Pro or Serato DJ Lite before you start your next stream.
Live streaming your DJ sets is a great way to stay engaged with fans, build a new audience, or even just
Part 1 – Installing the virtual audio device
1. Download the latest version of Serato DJ Pro or Serato DJ Lite
In order to set up live streaming with Serato DJ Pro or Lite, you will first need the latest version.
2. Enable Serato DJ audio for other applications
- Launch Serato DJ
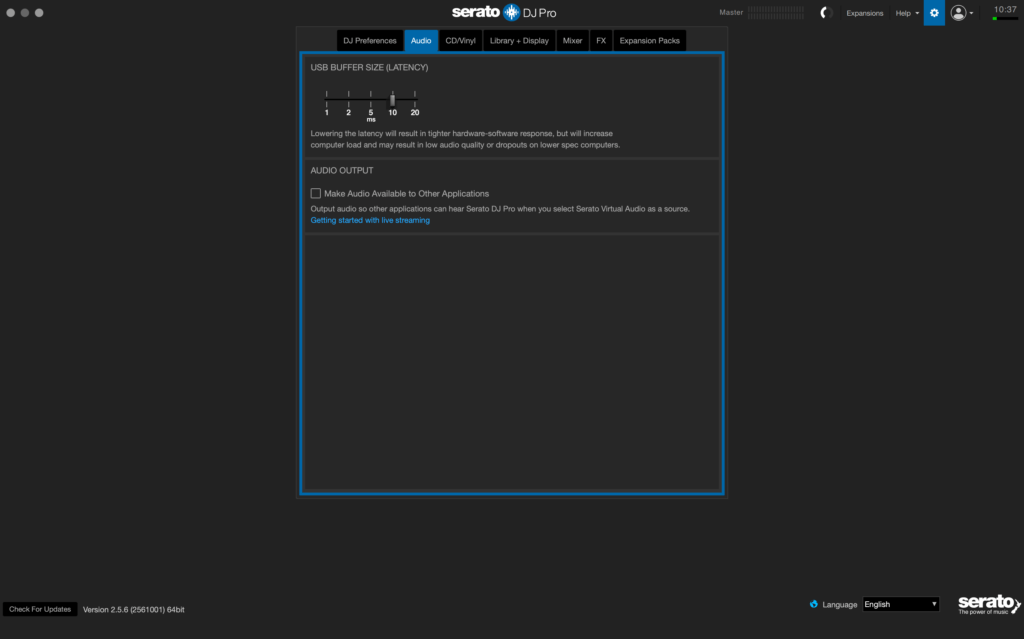
- Click on the Setup Cog on the right-hand side of the top toolbar
- Proceed to the Audio tab
- Click the ‘Make Audio Available to Other Applications’ checkbox

3. Download and install the virtual audio device
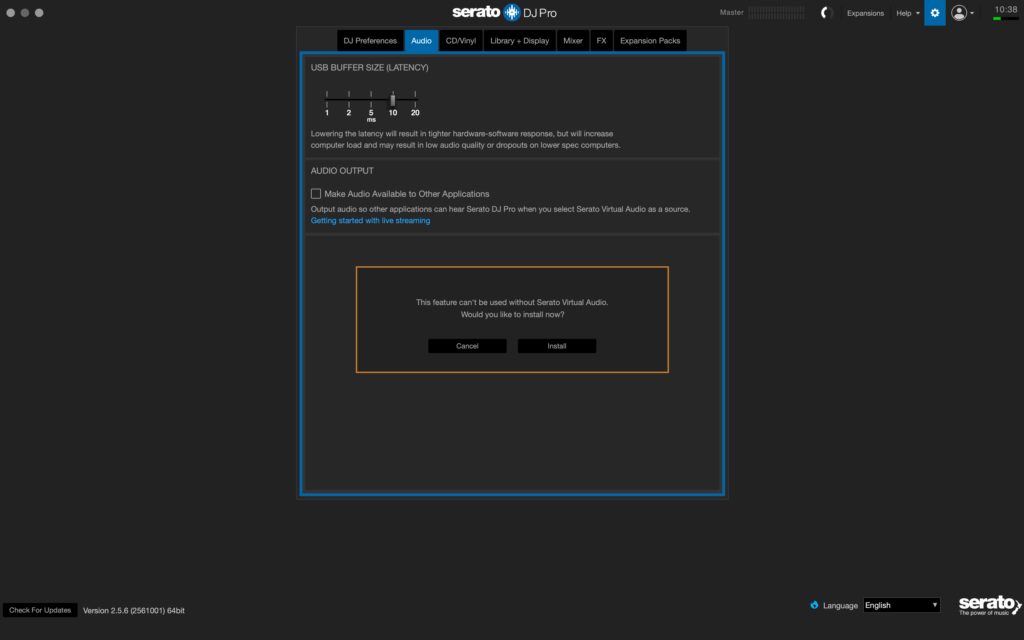
When you first enable the setting in Serato DJ, a popup will be shown. This will direct you to download a Virtual Audio Device (VAD) on your computer. macOS users can use the Serato Virtual Audio device, which is bundled with Serato DJ Pro 2.5.5 or Lite 1.5.5 and above. Windows users can use Virtual Audio Cable.

Once you’ve downloaded and installed it, head back to Serato DJ Pro and enable the ‘Make Audio Available to Other Applications’ checkbox in the settings.
Part 2 – Setting up your stream with OBS
1. Download OBS
Open Broadcaster Software (OBS) has proven to be a great option to use for live streaming. It’s free, and easy to use.
2. Get your hardware together.
Here’s the setup we recommend:
- Laptop for Serato DJ
- DJ mixer/Controller
- iPhone** or Webcam
**If you want to use your iPhone for a webcam you’ll need this – https://obs.camera/
Make sure you install the App on your phone and the Plugin for your computer (for OBS)
A quick insight into how to set it up with Serato DJ:
Just so you can get an idea, here’s an example of where everything is plugged in to.
Mic is pluggedin to the DJ Mixer- Serato DJ Laptop plugged
in to The DJ mixer via USB - iPhone or Webcam is plugged into
the the OBS Laptop/PC
Once your hardware is connected, you’ll need to navigate to the audio section of the Serato DJ settings to make sure “Make Audio Available to Other Applications” is enabled.
3. Open OBS
Once you’ve done so, you’ll need to create a new ‘Scene’. Click the ‘+’ sign the Scenes area to do so and label it whatever you wish.
4. Set up your Sources
1. Click the ‘+’ sign and Select the Audio Input Capture
2. Check ‘Create New’ to add a new device. You can name this what you want.
3. Choose the soundcard you want to receive audio from.
This will be Serato Virtual Audio (Mac) or Virtual Audio Cable (Windows)
4. Do a quick line check and make sure your audio is being received by OBS.
You should see audio coming into the VU meter in the ‘Audio Mixer’ area of the software.
5. Add your Webcam/iPhone
Click the ‘+’ sign and choose one of the options from the list.
Select the Video Capture Device (for a webcam) to add from the menu. Or if you don’t have a webcam, get the OBS Camera App for your iPhone. Make sure you follow these instructions carefully.
In this demo, I’m going to choose IOS Camera to add from the Sources list (if you don’t see this, you need to make sure you’ve installed the plugin for OBS Camera on your laptop/PC)
You’ll be prompted to ‘create new’ Click OK
Plug in your iPhone via the USB with the OBS app open on it.
Your iPhone camera should now show up.
You can choose it from devices list if it hasn’t automatically, or you may need to reconnect to device if you’ve had a disconnection”
Click OK and Resize your visual by clicking on the corner of the visual and dragging to fill the Canvas (Black area)
We’re now going to add a logo to the sources. Click the Image option from the + menu in Sources
Again, ‘Create New’ and name what you want. I called it “Logo” and click OK
Browse for your desired image or logo.
*Suggestion – use a .png file format so it looks professional. (.jpeg files are fine if you don’t have this)
Click OK once you’ve found the right one
You’ll probably need to resize this too. Do so by clicking on the corner of the image until it’s the right size and position on your screen.
Now you’re all set up in OBS. Do a quick level check to make sure audio is being sent to OBS and be sure to mute the internal microphone.
I suggest pressing Record and checking everything to make sure it looks and sounds good.
6. Choose your streaming service
Now you’ll need to get your streaming key from whatever streaming platform you want to use. In this demo I’m using Twitch.
You’ll find this under your Account Settings in the Channel and Videos Tab.
Copy the Stream key and paste it in OBS Studio in the Settings>Stream Tab once you’ve selected the Streaming platform you choose to use.
Save this profile and label it so you can get going quickly the next time you want to live stream.
Free Visuals and Twitch Extension
We’ve created a bunch of visuals to enhance your livestream. These range from DJ booth overlays, moving backgrounds and any weird and wonderful graphic you could think of to set the tone. The best part? They’re completely free to download. Click here to find out more and download your favourites.
We also offer an exclusive Twitch extension, which shows the tracks you’re spinning in real time. Now fans can cherry pick their favourite songs from your set without having to hit you up later.
Time to broadcast…
Press ‘Stream’ to go live, and start playing your beats…
We hope you have an enjoyable experience giving streaming a try, and don’t hesitate to hit us at support@serato.com if you have any questions or queries regarding your hardware or software.

