How to manipulate your samples: Beat Making Basics #3
How to get the most out of sampling
Sampling. Such a vibrant aspect of music production and the bones of so many modern music genres, from hip hop to house.
The more you know how to massage a sample fit the context of your track, the better. Like all music production techniques, practice will bring improvement – but we wanted to break down the basics for you before you get started.
Using parameters
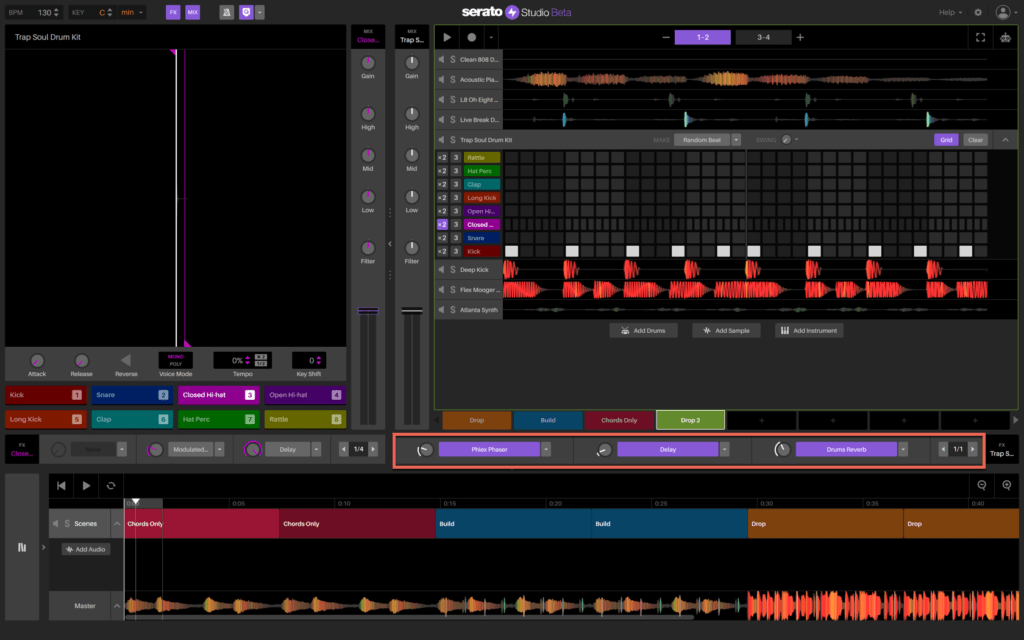
Parameters are the different areas of a sample that you can approach and manipulate. This explanation may come across a bit abstract when reading it, so we’d recommend opening up Serato Studio and try and play around with the features we’re discussing so you can hear how the sound changes while reading this. It’ll make things easier to understand and remember.

Attack refers to how hard and fast the sample comes in at the beginning of the audio. If the attack is tight (turned to the far left), the sample will come in hard and fast. Similarly, if the attack knob is set far to the right, the sample will come in slowly and softly.
Release refers to how long a sample lingers after its audio has finished. Think about release as the opposite of attack. If the release knob is turned far left, the sound will immediately stop as soon as the sample has finished playing. If it’s set to the far right, there will be some remaining elements, like reverb and echo, that stick around for a little longer.
Reverse is precisely that. By clicking the reverse button in Serato Studio, the sample will play backwards. This is great for creating interesting textures, or building suspense into a significant moment in your track.
EQing out the bass
EQ refers to the high, medium, and low frequencies produced from an audio signal. As you might imagine, bass tones are the low frequencies, while hi-hats and vocals high frequencies.
Samples can often come with unwanted bass tones. The more you remove this unwanted noise, the cleaner the sample will sound in your track.
To do this, use the EQ knobs in Serato Studio’s mixing channel next to the sequencer and turn the ‘low’ knob anti-clockwise. This will remove as much of the bass tones as possible, cleaning up your sample and allowing room for your bass that you may add yourself.
Half or double-timing your sample’s BPM
It’s exactly what it sounds like. The sample would’ve been originally recorded at a specific BPM, which you can double or halve in speed to suit your track.
In Serato Studio, this is easily done. In the top left corner of your sample file, you’ll see two buttons stacked on top of each other. One says ‘x2’ and the other says ‘½’.
Press the former to double-time your sample and the latter to halve it. This will bring a whole new vibe to your beat and help you create those happy musical accidents. As always, experiment and have fun with BPM manipulation and see where you land.
Using FX on your samples
FX (effects) are a great way to add some color to the different layers of your track. Here’s a quick breakdown of the different FX that you can find in Serato Studio and how and when to use them.
Reverb
Reverb is when a sound hits and reflects back to the listener at varying times and amplitudes to create an echo. Essentially, it’s the remaining noise you hear after the sound is played. Think of it of the crumbs that remain on your plate to indicate there was once a meal there.
Great for drums or anything that you want to sound big and spacey to fill your track.
Sidechain
Sidechain is where you link two of your layers and one informs the loudness of the other. Say you link audio track A to audio track B. It means when B occurs, A ducks out completely.
In more practical terms, a lot of producers sidechain synths to their kick drums to create a waving, flowing effect.
Delay
Delay is when a certain part of your sample is played back to you for a period of time. These are assigned to different time signatures, or to the BPM of your track.
Panning
Panning refers to when the audio produced is sent to the left side or the right side of where you can hear it. This can be permanently fixed on one side, or you can set audio to transition from one side to the other over a certain section of your track.
Phaser
Phasing is an effect you can apply to an audio channel, which creates a series of highs and lows throughout the duration of the audio to create a metallic, sweeping effect.
So now you’ve got the low down on some of the most popular FX in Serato Studio it’s time to apply them. FX are key in shaping your personal sound, so go ahead and experiment – that’s where the fun happens.